Understanding Rifle Scope Adjustment Turrets
Mastering how to adjust a rifle scope begins with demystifying the control knobs, known as turrets. These mechanisms are the interface between your optic and the rifle\’s barrel alignment, allowing you to zero the weapon effectively. Before heading to the range, familiarize yourself with the layout to ensure every adjustment is deliberate and precise.
Elevation: Adjusting Vertical Impact
The elevation turret is located on top of the scope body and controls the vertical movement of the crosshairs. When adjusting a rifle scope for elevation, you are compensating for bullet drop or vertical misalignment.
- Look for the Arrow: Most turrets are marked with \”UP\” and a directional arrow.
- The Golden Rule: Always adjust the scope in the direction you want the bullet impact to move.
- If your shot hits LOW, dial the turret UP.
- If your shot hits HIGH, dial the turret DOWN.
Windage: Adjusting Horizontal Impact
Located on the right side of the scope tube, the windage turret manages horizontal drift. Learning how to adjust rifle scope windage is critical for correcting errors caused by wind or mounting misalignment.
- Directional Indicators: Look for \”R\” (Right) or \”L\” (Left) markings.
- Adjustment Logic:
- If the bullet strikes to the LEFT of the bullseye, dial the turret RIGHT.
- If the bullet strikes to the RIGHT, dial the turret LEFT.
Magnification and Diopter Settings
Knowing how to adjust a scope on a rifle involves more than just moving the crosshairs; you must also ensure a clear sight picture.
- Diopter (Fast Focus Eyepiece): Found at the rear of the scope. Rotate this ring to focus the reticle, not the target. Look at a blank wall and adjust until the crosshairs are crisp and sharp.
- Magnification Ring: Located just forward of the eyepiece. This ring changes the zoom level.
- Low Power: Wider field of view, ideal for close-range or moving targets.
- High Power: Increased detail for precision shots at long distances.
MOA vs. MRAD: Understanding Your Scope’s Click Values
When learning how to adjust a rifle scope, the first hurdle is understanding the language your turrets speak. Those audible \”clicks\” you feel when turning the dial aren\’t arbitrary; they correspond to specific angular measurements. Before you start twisting knobs, you need to know if your optic communicates in Minutes of Angle (MOA) or Milliradians (MRAD). Knowing this prevents the frustration of over-correcting and wasting ammo.
How Minutes of Angle (MOA) Work
MOA is the most common system found on scopes in the United States and is generally easier for those accustomed to the Imperial system (yards and inches). While the math can get technical, the practical rule of thumb is simple: 1 MOA equals approximately 1 inch at 100 yards.
Most MOA scopes feature 1/4 MOA clicks. This means:
- 4 clicks = 1 MOA of movement.
- At 100 yards, 4 clicks moves the bullet impact 1 inch.
- At 100 yards, 1 click moves the bullet impact 1/4 inch.
If you are adjusting a rifle scope at 200 yards, that same 1 MOA angle spreads out to 2 inches. This system is precise and intuitive if you naturally estimate distances in yards and target sizes in inches.
The Metric System and Milliradians (MRAD)
MRAD (often called \”Mils\”) is the standard for military applications and many long-range competition shooters. It is based on the metric system, making the math incredibly straightforward if you think in meters and centimeters. 1 Mil equals exactly 10 centimeters at 100 meters.
Most MRAD scopes use 0.1 Mil clicks. Here is the breakdown:
- 10 clicks = 1 Mil of movement.
- At 100 meters, 1 click moves the bullet impact 1 centimeter.
- At 100 meters, 10 clicks moves the bullet impact 10 centimeters.
Many shooters find adjust rifle scope settings easier with MRAD because it relies on a base-10 system, eliminating the need to deal with fractions like 1/4 or 1/8.
Choosing the Right Measurement System for Your Rifle
Deciding between MOA and MRAD ultimately comes down to personal preference and what your shooting partners use. If your friends all shoot MOA, it is easier to spot for each other and call out corrections in a shared language. However, if you prefer the simplicity of the metric system, MRAD is likely the better choice.
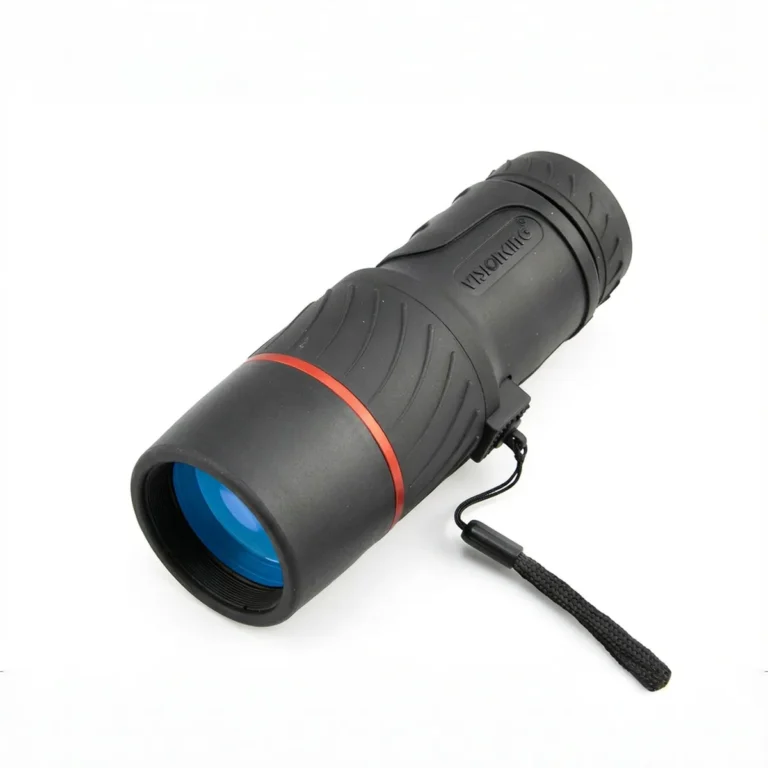
Regardless of the system you choose, verification is key. When you are at the range zeroing your rifle, having a clear view of your target is essential for calculating the necessary clicks. Using a high-quality optic like the Visionking 15-45×60 angled zoom spotting scope allows you to see exactly where your rounds are impacting without walking downrange, making the adjustment process much faster.
for selection:
- Choose MOA if: You think in yards/inches and want finer adjustment capability (1/4 inch clicks are slightly finer than 1cm clicks).
- Choose MRAD if: You prefer the metric system, want easier base-10 math, or plan to shoot tactical competitions.
Pre-Adjustment Checklist: Mounting and Bore Sighting
Before you start clicking turrets and burning through ammunition, you need to ensure the physical setup of your optic is flawless. Learning how to adjust a rifle scope effectively starts at the workbench, not the shooting bench. If the foundation isn\’t solid, no amount of windage or elevation tweaking will hold zero, especially with the high-shock resistance standards we build into our Visionking optics.
Ensuring a Secure and Level Scope Mount
The most common reason shooters struggle with adjusting a rifle scope is a loose or improper mount. Our scopes are engineered to withstand the heavy recoil of calibers up to .50 BMG, but they rely on high-quality rings and bases to stay put. You must verify that your ring size matches the main tube diameter of your specific model, whether it is 25.4mm, 30mm, 34mm, or 35mm.
When mounting a robust model like the Visionking 1.5-6×42 Rifle Scope with 30mm tube, use a bubble level to ensure the reticle is perfectly perpendicular to the rifle action. If the scope is canted, your vertical adjustments will unintentionally pull shots to the side at long distances. Tighten the ring screws to the manufacturer\’s torque specifications in a crisscross pattern to apply even pressure without crushing the tube.
Setting Correct Eye Relief for Consistency
Eye relief is the distance between your eye and the ocular lens when you have a full, clear field of view. Setting this correctly is vital for both accuracy and safety. Since many of our customers use Visionking scopes for hunting and tactical applications with high-recoil rifles, proper spacing prevents \”scope bite\”—where the recoil drives the scope into your brow.
To set this:
- Shoulder the rifle in your natural shooting position (prone or bench).
- Close your eyes and settle your cheek against the stock.
- Open your eyes and slide the scope forward or backward in the rings until the image is full and edge-to-edge clear, with no black shadows (vignetting).
- Once found, mark the position or lightly tighten the rings before final leveling.
Initial Bore Sighting to Get on Paper
Bore sighting is a rough alignment process that saves you time and money. It ensures that your first live round lands somewhere on the target paper, rather than in the dirt. You cannot effectively practice how to adjust a scope on a rifle if you can\’t see where your bullets are impacting.
For bolt-action rifles, remove the bolt and look through the barrel at a distinct target about 25 to 50 yards away. Center the target in the circle of the barrel. Without moving the rifle, look through the scope and dial the elevation and windage turrets until the crosshairs align with the same target. If you are using a semi-automatic or lever-action, a laser bore sighter is a necessary tool to achieve this initial alignment. Once bore-sighted, you are ready for live-fire fine-tuning.
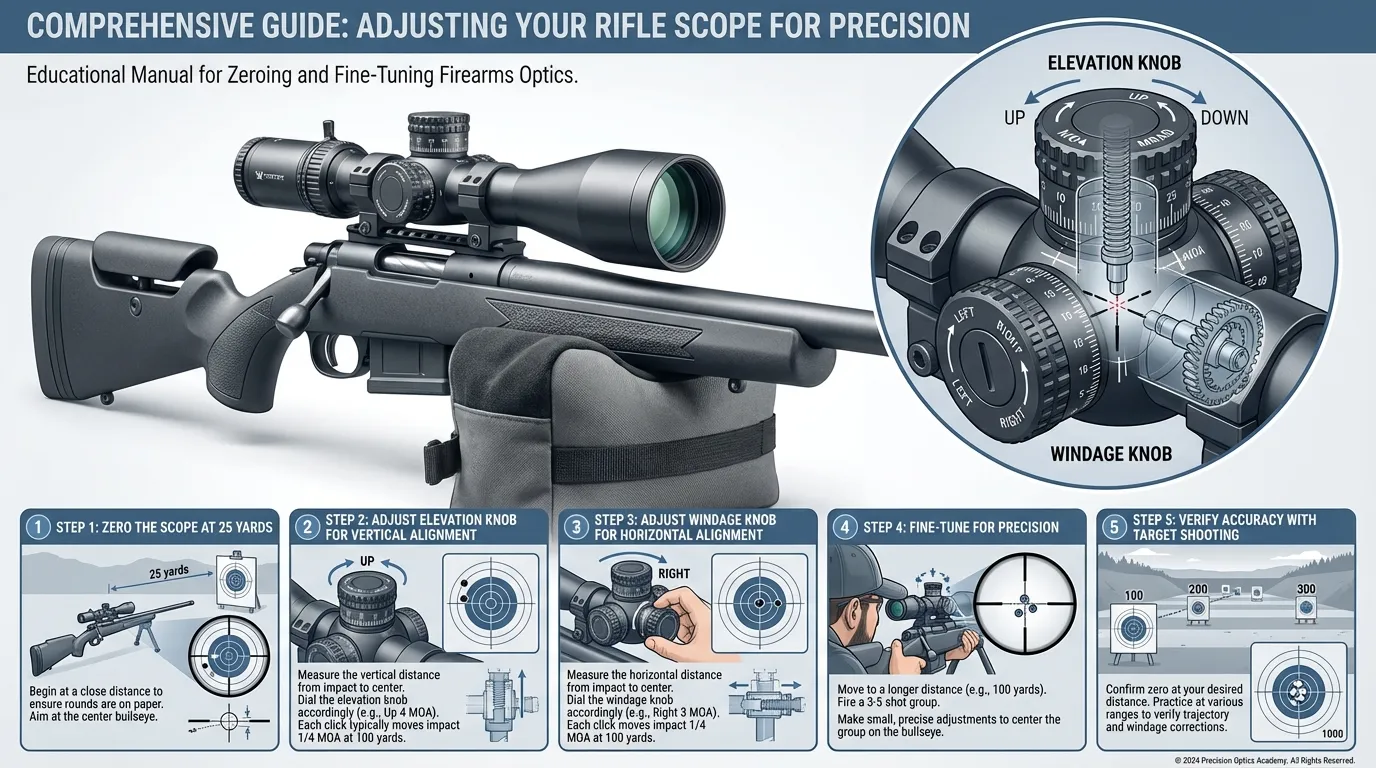
How to Zero Your Rifle Scope: A Step-by-Step Guide
Zeroing is the most critical phase of the setup process. It is the moment where we align the mechanical axis of the optic with the barrel\’s trajectory. Learning how to adjust a rifle scope for a perfect zero ensures that where you aim is exactly where the bullet strikes.
Selecting the Ideal Zero Distance
For most hunting and target shooting applications, a 100-yard zero is the standard. However, if you have just mounted a new optic, I strongly recommend starting at 25 yards. Starting close ensures your shots land on the paper, saving you ammunition and frustration. Once you are centered at 25 yards, move the target out to your desired final distance (usually 100 or 200 yards) to fine-tune the settings. This two-step approach is the most efficient method when figuring out how to adjust scope on rifle setups.
Establishing a Stable Shooting Position
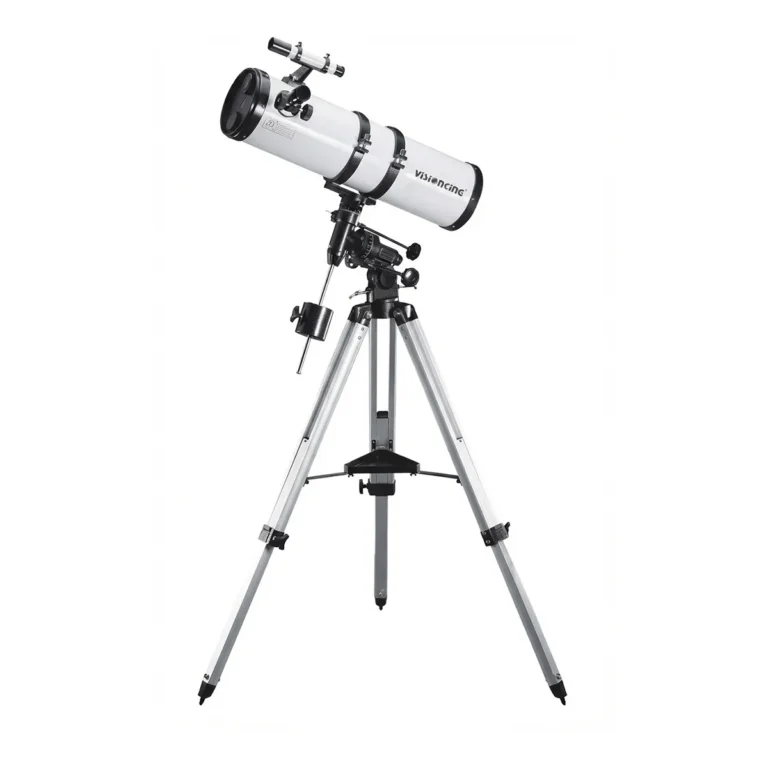
You cannot achieve an accurate zero if the rifle is moving. To eliminate human error, use a solid bench rest, sandbags, or a lead sled. The goal is to take the shooter out of the equation as much as possible. Efficiency is key here; instead of walking downrange after every shot, I set up a Visionking 20-60×80 spotting scope right next to me on the bench. This allows me to instantly verify impact points and make corrections without breaking my shooting position.
Firing and Analyzing Your Shot Group
A common mistake when learning how do you adjust a rifle scope is chasing individual bullet holes. Never adjust after a single shot. Always fire a three to five-round group. Bullets can deviate slightly due to ammunition inconsistencies or barrel heat.
- Aim at the bullseye and fire 3 shots.
- Identify the center of that cluster (the average point of impact).
- Measure the distance from that center point to your point of aim (the bullseye).
If you are zeroing at longer distances where bullet holes are hard to see, a high-power Visionking 30-90×90 waterproof spotting scope is essential for analyzing the group tightens without leaving the firing line.
Making Precise Turret Adjustments
Once you have your measurements, it is time to physically adjust rifle scope turrets. You need to know your scope\’s click value (usually 1/4 MOA or 0.1 MRAD).
- Example: If your shot group is 2 inches low and 1 inch right at 100 yards, and your scope is 1/4 MOA:
- Elevation: You need to move the impact Up 2 inches. Since 4 clicks = 1 inch, dial 8 clicks Up.
- Windage: You need to move the impact Left 1 inch. Dial 4 clicks Left.
After dialing, fire another three-round group to confirm the point of impact has shifted to the center. This confirmation step is vital when mastering how to adjust the scope on a rifle.
Understanding Point of Impact vs. Reticle Movement
When learning how to adjust a rifle scope, one of the biggest points of confusion is understanding exactly what happens when you turn the turrets. Many shooters mistakenly believe they are moving the crosshairs to the bullet hole. In reality, the turrets are designed to move the Point of Impact (POI).
If your shot lands low, you don\’t want to move the reticle down to the hole; you want to move the bullet impact up to the center of the target. Our Visionking optical systems are engineered so that the turret markings correspond directly to bullet movement, ensuring that when you dial \”Up,\” your next shot actually lands higher.
The Direction of Adjustment Rule
The golden rule for adjusting a rifle scope is simple: chase the bullet. The markings on your elevation and windage turrets indicate the direction the bullet impact will shift, not the reticle.
- If the bullet hits LOW: Turn the elevation turret in the direction marked \”UP.\”
- If the bullet hits HIGH: Turn the elevation turret in the opposite direction (Down).
- If the bullet hits LEFT: Turn the windage turret in the direction marked \”R\” (Right).
- If the bullet hits RIGHT: Turn the windage turret in the opposite direction (Left).
On precision optics like the Visionking 2-16×44 Side Focus rifle scope, these adjustments are crisp and tactile, allowing you to feel every click without taking your eye off the target.
Calculating Clicks Based on Target Distance
To adjust rifle scope settings accurately, you need to know your scope\’s \”click value.\” Most of our tactical and hunting scopes use 1/4 MOA (Minute of Angle) clicks. This means one click moves the point of impact approximately 1/4 of an inch at 100 yards.
The Math Made Simple (at 100 yards):
- 1 Click = 0.25 inches
- 4 Clicks = 1 inch
If your shot is 2 inches low at 100 yards, you need to move the impact up by 2 inches. Since 4 clicks equal 1 inch, you would dial 8 clicks UP. For finer precision, some of our competition models feature 1/8 MOA adjustments, requiring double the clicks for the same distance.
Confirming and Locking Your Final Zero
Once you have dialed in your corrections, fire a three-shot confirmation group to ensure the rifle is truly zeroed. A solid zero means your point of aim matches your point of impact consistently. Because our scopes are built with high shock resistance—tested on heavy calibers like .308 and .30-06—the zero should hold firm even after repeated firing.
After confirming accuracy, many of our models, such as the Visionking 1-10×28 rifle scope, feature lockable tactical turrets. Push down or tighten the locking mechanism to prevent accidental shifts during transport or field use. This step is critical for maintaining confidence that your optic remains calibrated for your next hunt or match.
Troubleshooting Common Scope Adjustment Issues
Even when you know exactly how to adjust a rifle scope, mechanical quirks or environmental factors can throw off your shot. Sometimes the problem isn\’t your math or your trigger pull; it\’s a subtle hardware issue that needs troubleshooting.
Managing Parallax for Long-Range Clarity
If you look through your optic and the crosshairs seem to \”float\” or move around the target when you shift your head slightly, you are dealing with parallax error. This is a common hurdle when learning how to adjust scope on rifle setups for long-range shooting.
Parallax isn\’t just about a blurry image; it actually changes where your rifle is aiming based on eye position. To fix this:
- Secure the rifle: Keep it completely still.
- Move your head: Shift your eye up, down, left, and right while looking through the lens.
- Adjust the knob: Turn the side focus or adjustable objective ring until the reticle stops moving against the background.
Once the crosshair stays locked on the target regardless of your eye movement, your parallax is set correctly.
What to Do If Your Scope Won\’t Hold Zero
There is nothing more frustrating than adjusting a rifle scope, getting it perfect, and then finding your shots wandering all over the paper the next day. If your rifle won\’t hold zero, stop wasting ammo and check the hardware.
Before you blame the internal mechanics, run through this checklist:
- Check the Mounts: Loose rings or bases are the #1 cause of shifting zeros. Ensure every screw is torqued to the manufacturer\’s specifications.
- Inspect the Barrel: Make sure the barrel isn\’t touching the stock (unless it\’s supposed to), as this affects harmonics.
- Test for Internal Failure: If the mounts are solid, the scope\’s erector system might be broken. This usually requires a warranty repair.
Correcting Reticle Cant and Alignment Errors
Reticle cant happens when your scope isn\’t perfectly level with the rifle\’s action. If your scope is tilted slightly to the left or right, how do you adjust a rifle scope for elevation without ruining your windage? You can\’t.
If the scope is canted, dialing the turret \”UP\” will actually move the impact \”UP and LEFT\” (or right). To fix this:
- Use Bubble Levels: Place a small level on the rifle rail and another on the scope\’s flat top turret.
- Align Vertically: Use a plumb line (a string with a weight) at 50 yards. Align your vertical crosshair with the string while keeping the rifle level.
- Tighten Evenly: Tighten your ring screws in a crisscross pattern to prevent the scope from rotating while you lock it down.
Correcting cant ensures that when you adjust rifle scope turrets for bullet drop, the bullet actually travels in a straight vertical line.
Frequently Asked Questions About Adjusting Rifle Scopes
Mastering how to adjust a rifle scope often comes down to clearing up a few common misconceptions. Whether you are a beginner or just need a refresher, these answers will help you manage your optics with confidence.
Should I Adjust for Bullet Impact or Crosshairs?
This is the most common point of confusion when learning how to adjust rifle scope turrets. You should always adjust for the bullet impact. The markings on your turrets (UP/DOWN, LEFT/RIGHT) indicate the direction the bullet will move on the target, not the direction the crosshairs move inside the tube.
- If you are hitting LOW: Dial the elevation turret UP.
- If you are hitting HIGH: Dial the elevation turret DOWN.
Think of it as moving the hole in the paper toward the center of the bullseye.
How Do I Adjust My Scope If Shooting to the Right?
If your shots are landing to the right of your aim point, you need to move the Point of Impact (POI) to the left. When figuring out how to adjust a scope on a rifle for windage errors, follow these steps:
- Locate the side turret (Windage).
- Look for the \”L\” (Left) or \”R\” (Right) markings.
- Since you are hitting right, you need to go Left.
- Turn the dial in the direction of the \”L\” arrow or opposite the \”R\” arrow.
If you are unsure how do you adjust a rifle scope without markings, remember the \”Right-Hand Rule\” for many standard scopes: turning the side screw clockwise usually moves the impact Left, but always verify with your manual.
How Often Should I Re-Zero My Rifle?
Knowing how to adjust the scope on a rifle is only half the battle; knowing when to do it is just as critical. You shouldn\’t need to adjust your turrets every trip if you have quality gear, but certain scenarios require a confirmation of zero. You can read more about our dedication to precision manufacturing on our about us page.
You should re-zero or check your zero if:
- You change ammunition: Different bullet weights and loads fly differently.
- The rifle was dropped: Hard impacts can shift the optic\’s alignment.
- Temperature shifts: Extreme weather changes can affect ballistics and metal expansion.
- Travel: Vibrations during long transport can loosen mounts.
- Barrel removal: If you take the rifle apart for cleaning, always verify zero afterward.
Regularly practicing adjusting a rifle scope ensures that when the moment counts, your shot lands exactly where you intend.