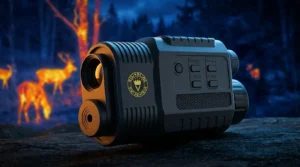
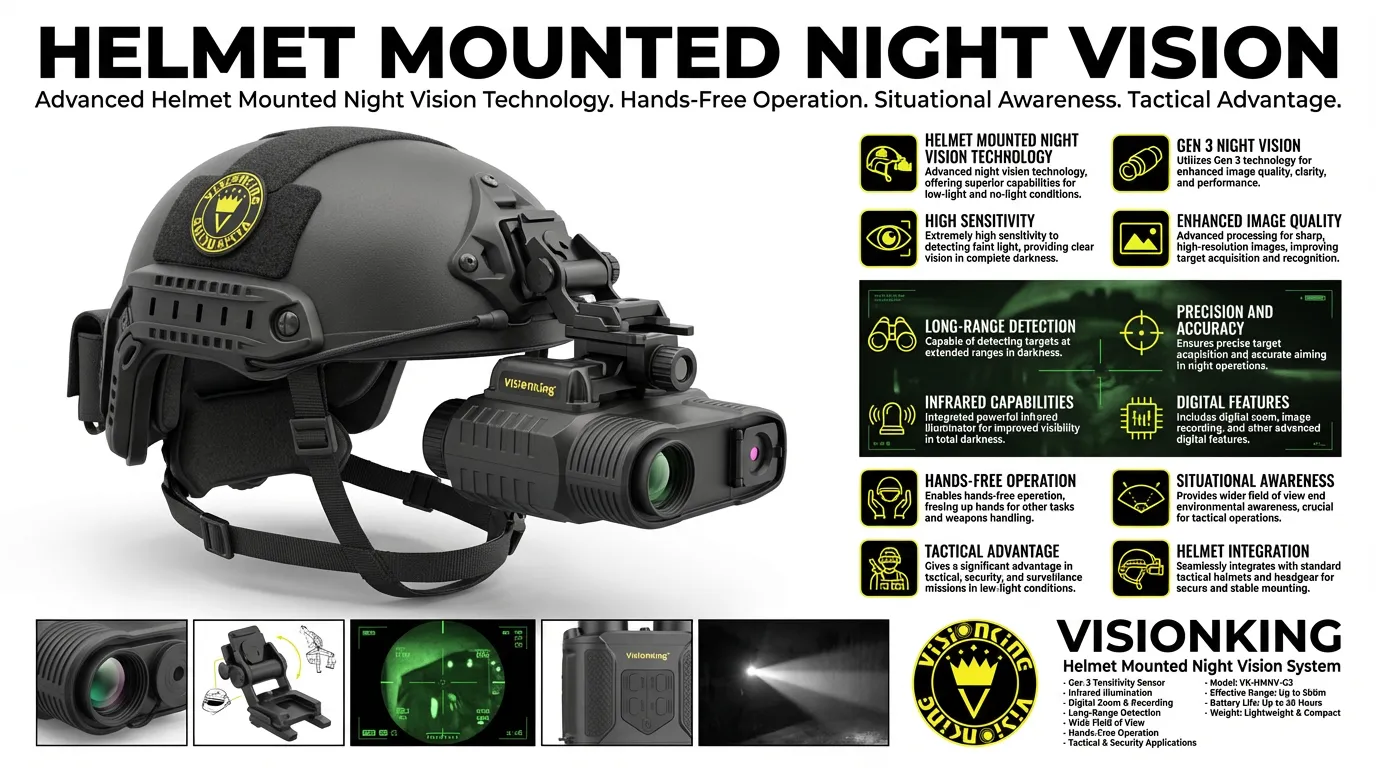
Understanding Helmet Mounted Night Vision Systems
When operating in low-light or no-light environments, having your hands free is not just a convenience—it is a tactical necessity. Helmet mounted night vision transforms a standard optical device into a fully integrated system, allowing you to maintain situational awareness while handling weapons, navigating terrain, or administering aid. Whether for military applications, law enforcement, or civilian use, understanding the architecture of these systems is the first step to owning the night.
Core Components of a Night Vision Helmet Setup
A helmet mounted night vision device is a complex assembly of precision parts designed to amplify available light. Based on the fundamental technology of image intensification, these systems rely on several key components working in unison:
- Objective Lens: Captures ambient light (photons) from the environment.
- Photocathode: Converts the captured photons into electrons.
- Microchannel Plate (MCP): A critical component in modern Gen 2 and Gen 3 systems, this plate multiplies the number of electrons significantly to intensify the image.
- Phosphor Screen: The multiplied electrons strike this screen, converting them back into visible light (the green or white image you see).
- Eyepiece: Focuses the resulting image for the user\’s eye.
Primary Types: Monocular vs. Binocular
When selecting a night vision helmet mounted configuration, the choice typically falls between single-tube and dual-tube systems.
- Monocular (Single-Tube): These systems use one image intensifier tube. They are lighter and allow one eye to remain adapted to natural darkness, which can be crucial for situational awareness.
- Binocular (Dual-Tube): These utilize two tubes, providing depth perception and easier navigation. While heavier, they offer a more natural viewing experience.
- Panoramic: As noted in advanced setups, these use four tubes to provide a significantly wider field of view compared to standard goggles.
Generations: The Standard for Performance
The capability of your helmet mounted night vision goggle depends heavily on the generation of the image intensifier tube.
- Gen 0 & Gen 1: Early technology. Gen 0 required active infrared light (making the user visible to others with NVGs), while Gen 1 passively amplified ambient light but with lower resolution.
- Gen 2: Introduced the Microchannel Plate (MCP), drastically increasing brightness and clarity.
- Gen 3: The current standard for high-performance operations. These tubes use a photocathode made of Gallium Arsenide, offering superior sensitivity and resolution in extremely low light conditions compared to previous generations.
Key Advantages of Helmet Integration
Mounting night vision to a helmet provides distinct operational benefits over handheld units. A proper NVG helmet mount setup ensures:
- Balance and Ergonomics: By securing the device to a helmet (often with counterweights), the weight is distributed more evenly, reducing neck strain during prolonged use.
- Rapid Transition: Most mounts allow the user to quickly flip the goggles up and out of the way when lighting conditions change or the device is not needed.
- Tactical Efficiency: The primary advantage is hands-free operation, allowing for effective engagement and movement in complete darkness.
Essential Features to Prioritize in Helmet Mounted Night Vision
When building a helmet mounted night vision setup, the specifications directly impact your operational effectiveness and physical endurance. You aren\’t just buying a camera; you are investing in a complex system of optics and electronics designed to turn darkness into a tactical advantage.
Image Intensifier Tube Technology
The core of any NVG is the image intensifier tube. As outlined in industry standards, performance jumps significantly between generations. Gen 3 night vision helmet mounted systems are the gold standard for professional use, utilizing a Gallium Arsenide photocathode for superior light sensitivity and resolution compared to older Gen 2 models.
- Autogating: Crucial for dynamic environments. Autogated night vision tubes rapidly turn the power supply on and off to protect the tube from bright light sources (like muzzle flashes) while maintaining a steady image.
- Phosphor Screen: The choice between Green Phosphor and White Phosphor affects contrast. White phosphor is often preferred today for providing clearer detail and reduced eye strain during long sessions.
- Signal-to-Noise Ratio (SNR): A higher SNR means a cleaner image with less \”static\” or scintillation in low light.
For a comprehensive breakdown of how these internal parts function, read our guide to custom night vision system features.
Weight, Ergonomics, and Durability
Mounting optics to your head changes your center of gravity. Minimizing weight is essential to prevent neck fatigue during prolonged missions. A helmet mounted night vision device must be rugged enough to withstand impacts but light enough to wear for hours.
Key Performance Indicators:
| Feature | Importance for Helmet Use |
|---|---|
| Field of View (FOV) | Standard 40° FOV is critical for maintaining situational awareness while moving. |
| Housing Durability | Look for robust materials that offer waterproofing and shock resistance. |
| Power Efficiency | Long battery runtime (using AA or CR123) reduces the need for frequent swaps in the field. |
| Mount Compatibility | Ensure the housing fits standard dovetail or bayonet helmet shrouds for a secure, wobble-free lock. |
Prioritizing these features ensures your gear enhances your capabilities rather than becoming a burden. Whether for tactical applications or search and rescue, the right balance of optical performance and physical weight is vital.
Popular Configurations and Their Best Use Cases
When configuring a helmet mounted night vision system, the setup you choose directly impacts your effectiveness and comfort in the field. We generally break these down into specific categories based on tube count and housing mechanics, as each offers distinct advantages depending on whether you are conducting tactical operations or recreational hunting.
Monocular Setups: Lightweight Efficiency
For users prioritizing weight savings and budget, a night vision monocular helmet setup is the go-to standard. Single-tube systems allow you to aid one eye with night vision while keeping the other naturally dark-adapted. This configuration is incredibly versatile for general navigation and scanning, offering a helmet mounted night vision monocular solution that minimizes neck strain during extended wear. It is the most cost-effective entry point for gaining a tactical advantage without the bulk of dual tubes.
Binocular Systems: Depth Perception and Speed
If your operations involve driving, moving rapidly through uneven terrain, or close-quarters engagements, a binocular night vision helmet setup is essential. Dual tubes provide stereoscopic vision, giving you the depth perception needed to judge distances accurately.
- Articulating Binoculars: These feature independent pods that can rotate out of the line of sight. This design allows you to flip one pod up to check a map or use a thermal device, essentially giving you a hybrid capability between a monocular and binocular system.
- Fixed-Bridge Binoculars: Known for rugged durability, fixed-bridge systems have fewer moving parts. They are often lighter and more robust, making them ideal for high-impact tactical helmet night vision scenarios where gear reliability is paramount.
For those looking to upgrade their capabilities, our night vision binoculars offer the depth perception required for safe movement and effective target identification in total darkness.
Application-Specific Recommendations
- Tactical Operations: We recommend hands-free night vision helmet systems, typically dual-tube, to ensure maximum situational awareness and safety in high-threat environments.
- Hunting: A single-tube unit often suffices for spotting game, but digital night vision binoculars can provide superior clarity for identifying targets at range.
- Recreational & Surveillance: Comfort is key here. A balanced setup with a proper counterweight ensures you can observe for hours without fatigue.
Choosing the Right Helmet Mount and Accessories
Your helmet mounted night vision experience is only as good as the hardware holding it in place. We often see users invest heavily in high-end tubes but struggle with unstable mounting systems. Getting the interface right is critical for keeping your image stable and your hands free during operations.
Understanding Mount Standards: Dovetail vs. Bayonet
When setting up a night vision helmet setup, you will generally encounter two main interface standards. Choosing the right one depends on your specific housing and budget.
- Bayonet (Horn) Mount: This is the classic military standard, commonly seen with standard issue J-Arms. It is cost-effective and widely available, but it can suffer from slight wobbling.
- Dovetail Mount: This is the preferred standard for a modern helmet mounted night vision device. It offers a much tighter, lock-solid connection with zero play. If you are upgrading to a high-performance Wilcox night vision mount, the Dovetail interface is the superior choice for stability.
Balancing the Load with Counterweights
Physics is unavoidable; hanging a device off your forehead creates leverage that strains your neck quickly. A proper counterweight night vision helmet configuration is not optional—it is a necessity for comfort. By attaching a counterweight pouch (which often holds spare batteries) to the rear of the helmet, you shift the center of gravity back to the middle of your head. This balance drastically reduces fatigue during prolonged wear.
Essential Complementary Gear
To maximize the effectiveness of your helmet mounted night vision, you need the right accessories to support the mission.
- IR Illuminators: In zero-light conditions where there is no ambient starlight, a helmet-mounted IR light is essential for navigation.
- Remote Battery Packs: For binocular systems, a rear-mounted battery pack extends runtime significantly.
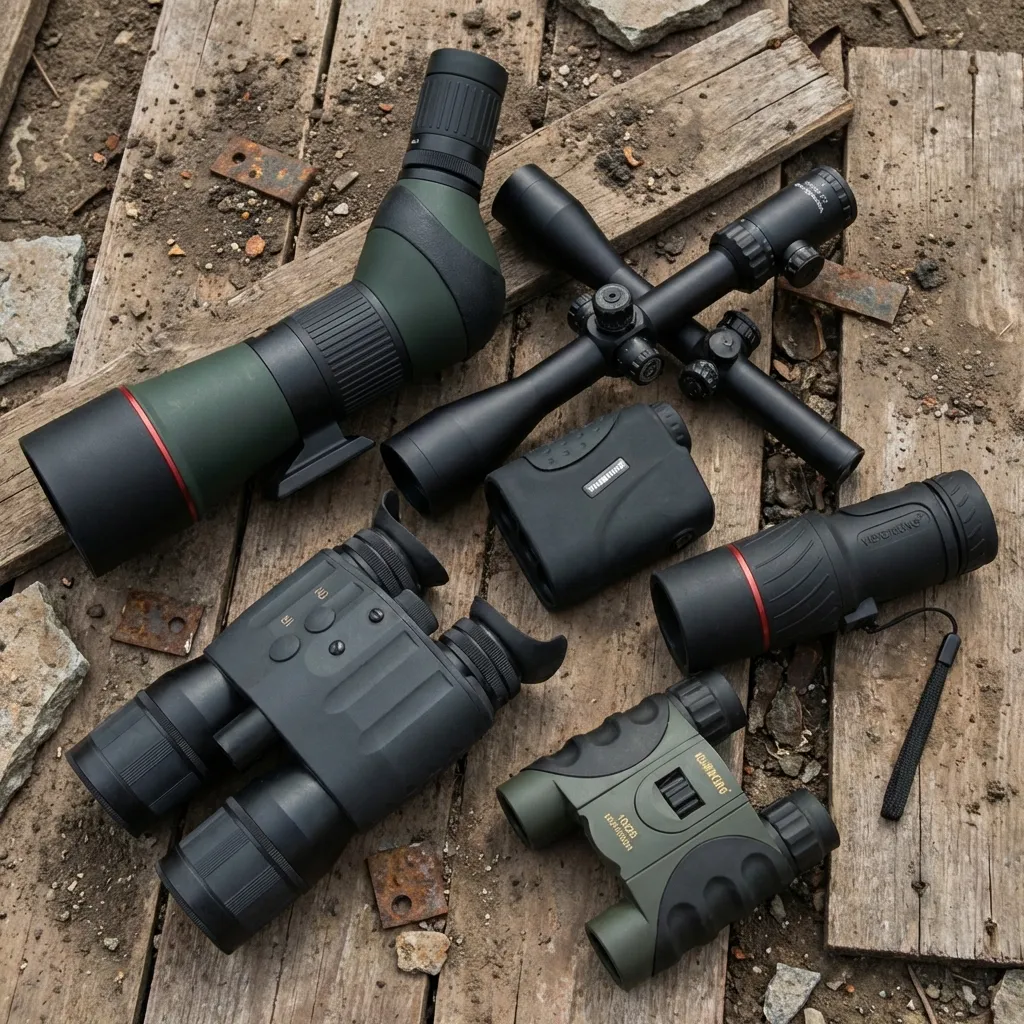
- Backup Optics: While your helmet setup handles active movement and navigation, keeping a pair of 7×50 military marine binoculars in your kit provides necessary high-magnification capability for static, long-range observation.
At Visionking, we design our optics to integrate seamlessly with these leading mounting ecosystems. Whether you are using a standard shroud or a specialized articulating arm, our housings are built to ensure a secure fit, giving you a professional-grade experience without the headache of mismatched parts.
Step-by-Step Setup Guide for Optimal Performance
Getting your helmet mounted night vision dialed in requires more than just snapping parts together; it demands a precise fit for safety and tactical effectiveness. A poorly set up rig leads to fatigue and lost situational awareness. Here is how I configure a system for the field.
Selecting a Compatible Helmet
Whether you choose a ballistic helmet for protection or a bump helmet for weight savings, the foundation is the shroud. Ensure your helmet features a standard 3-hole or 4-hole shroud pattern compatible with modern mounts. A tactical helmet night vision setup relies entirely on this interface being rock solid to prevent wobble during movement.
Installing the Shroud and Mount Arm
- Secure the Shroud: Check that all screws on the helmet shroud are tight. Loose screws cause the entire NVG helmet mount to shift.
- Insert the Mount: Slide your mount (like a Wilcox or rhino arm) into the shroud until it clicks.
- Test Stability: Give the mount a firm wiggle. There should be zero play. If it rattles, use foam or tape on the back of the mount to shim it tight.
Attaching and Adjusting the Device
Connect your night vision device helmet compatible unit to the mount arm. For a night vision monocular helmet setup (like a PVS-14), you will typically use a J-Arm. For binoculars, use the dovetail interface.
- Vertical Adjustment: Move the mount up or down so the optic centers directly over your eye.
- Tilt: Adjust the tilt lever so the tubes are parallel to your line of sight, not looking up or down.
- Eye Relief: Slide the device forward or backward. You want it close enough for a full field of view, but far enough to accommodate safety glasses.
Alignment and IPD Adjustment
For binocular systems, Interpupillary Distance (IPD) is critical. Slide the individual pods horizontally until the two images merge into a single, crisp circle. If you are accustomed to configuring optics, understanding custom binoculars performance features can help you appreciate the precision required for perfect optical alignment.
Common Troubleshooting
- Neck Strain: This is the most common complaint. If your helmet feels front-heavy, you must install a counterweight night vision helmet pouch on the rear. Proper balance prevents long-term fatigue.
- Tube Blooming: If light sources appear as massive halos, adjust your gain settings down or use an iris aperture.
- Flip-Up Testing: Ensure the mount folds up and locks securely without hitting the helmet shell. A hands-free night vision helmet system must stow away quickly when transitioning to high-light environments.
Maintenance and Care Tips for Longevity
Your helmet mounted night vision system is a significant financial and tactical investment. Keeping it operational requires more than just tossing it into a gear bag after a mission. Proper maintenance ensures that your night vision device helmet compatible setup remains reliable when you are operating in total darkness.
Cleaning Optics Safely
The objective lens and eyepiece are the windows to your environment. Scratching them ruins the image quality instantly.
- Dust Removal: Always use a specialized air blower or a soft brush to remove abrasive particles before wiping.
- Wiping: Use a dedicated lens pen or a clean microfiber cloth. Never use your shirt or paper towels, as these can strip coatings.
- Chemicals: Avoid harsh household cleaners. Stick to solutions designed specifically for coated optics. Just like maintaining the clarity on the best rifle scope, preserving the glass on your NVGs is critical for target identification.
Storage and Tube Protection
Image intensifier tubes are sensitive components. Improper storage is the fastest way to degrade a Gen 3 night vision helmet mounted unit.
- Blackboxing: Keep the objective lens caps on (day caps) whenever the unit is not in use, even if it is powered off.
- Environment: Store the device in a cool, dry, and dark environment. Extreme heat can damage the photocathode.
- Mount Inspection: Regularly check your NVG helmet mount and shroud for loose screws or grit that could cause instability.
Battery Management and Environmental Protection
Corrosion from leaking batteries is a common killer of electronics.
- Remove Batteries: If you are not using the unit for more than 24 hours, take the batteries out.
- Lithium vs. Alkaline: Lithium batteries are generally recommended for helmet mounted night vision because they are less prone to leakage and perform better in cold temperatures.
- Moisture Control: While many units are nitrogen-purged and waterproof, always dry the housing thoroughly after exposure to rain or humidity before storing it in a sealed case.
When to Seek Professional Servicing
Do not attempt to open the housing of your night vision device. Breaking the seal allows moisture and dust to enter, ruining the nitrogen purge. Seek professional repair if you notice:
- Tube Blooming: Excessive halos or permanent burn-in spots.
- Flickering: Power issues often indicate internal wiring faults.
- Fogging: Condensation inside the lens means the nitrogen seal has failed.
By following these protocols, you ensure your helmet mount night vision goggles are ready to perform every time you flip them down.
Frequently Asked Questions About Helmet Mounted NVGs
What is the best night vision generation for helmet mounting?
For professional use, Gen 3 night vision helmet mounted systems are the undisputed industry standard. In my experience, Gen 3 tubes provide superior resolution and light sensitivity, which is critical when you are moving in near-total darkness. While Gen 2+ is a cost-effective option for casual observation, Gen 3 features autogating technology that protects the tube (and your eyes) from sudden light spikes. If your budget allows, always prioritize the tube performance over the housing aesthetics.
Can I mount a monocular on a standard tactical helmet?
Yes, and it is a very popular configuration. While you might carry a standard portable Visionking 8×40 monocular for daytime scouting, night operations require a dedicated NVG unit like the PVS-14. A night vision monocular helmet setup allows you to mount the device using a J-arm and a standard shroud. This PVS-14 helmet mount configuration is excellent for maintaining situational awareness, as it leaves one eye naturally adapted to the dark while the other scans through the night vision device helmet compatible optic.
How do I prevent neck strain when wearing night vision goggles?
Neck fatigue is the most common issue with helmet mount night vision goggles, but it is easily fixable with proper balance. Since the device adds weight to the front, you must counterbalance it.
- Install a Counterweight: Use a counterweight night vision helmet pouch on the rear rails or Velcro patch. It should roughly equal the weight of your goggles (usually 300-500g).
- Adjust the Mount: Slide the optic as close to your eyes as possible to reduce the leverage effect.
- Check Helmet Fit: A loose helmet causes muscles to tense up; ensure your liner is snug.
What is the difference between articulating and fixed-bridge binoculars?
When choosing a binocular night vision helmet setup, the housing style dictates functionality.
- Articulating Night Vision Goggles: These allow individual pods to rotate sideways and up. This is ideal for stowing the goggles flat against the helmet to lower your profile and reduce snag hazards in vehicles.
- Fixed-Bridge: These are rigid and generally more durable. They are often lighter and simpler but stick out further when flipped up.
For dynamic tactical helmet night vision applications, I usually recommend articulating housings for their versatility and comfort during long missions.